Use edit mode in VS Code
With chat edit mode in Visual Studio Code, you can use natural language to make edits across multiple files in your project. The edits are applied directly in the editor, where you can review them in-place, with the full context of the surrounding code.
By selecting specific files and providing clear context, you can guide edit mode to make targeted code changes and improvements.
Prerequisites
- Install the latest version of Visual Studio Code
- Access to Copilot. Copilot Free plan and get a monthly limit of completions and chat interactions.
Why use edit mode?
Edit mode is optimized for making code edits across multiple files in your project. VS Code directly applies the code changes in the editor, where you can review them in-place. You can use edit mode to:
- Refactor parts of your codebase, such as "refactor this using async/await" or "use a singleton pattern for the database connection".
- Add new features to your codebase, such as "add a login form to the app".
- Fix bugs in your codebase, such as "the sort function fails when the input is empty, fix it".
- Write unit tests for your code, such as "add unit tests for the calculator class using vitest".
- Improve the performance of your code, such as "optimize the calculate function to make it more efficient".
Edit mode is particularly useful for coding tasks when you have a good understanding of the changes that you want to make, and which files you want to edit. If you have a less well-defined task, a high-level requirement, or changes that also require running terminal commands and tools, you might want to use agent mode instead.
Use edit mode
In edit mode, you select which files to edit and provide the relevant context and prompt. VS Code will suggest code edits based on your prompt.
-
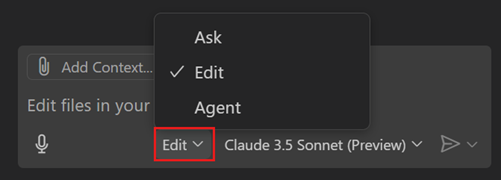
Open the Chat view (⌃⌘I (Windows, Linux Ctrl+Alt+I)) and select Edit from the chat mode selector.
-
Select Add Context or #-mention specific workspace files or context items to provide extra context for your prompt.
By adding context, you can get more relevant responses. For example, to ask questions that are specific to your current project, you can use the
#codebasecontext item. Type#in the chat input field to view the list of available context items.The active editor is automatically added as context. When you add files, other relevant files might be suggested.
-
Enter your prompt in the chat input field to indicate the type of edits you want to make.
Experiment with some of these example questions to get started:
Refactor the calculate function to make it more efficient.Add a login form to the app. Use OAuth for authentication.Add unit tests for the calculator class. Use vitest as the test framework.
-
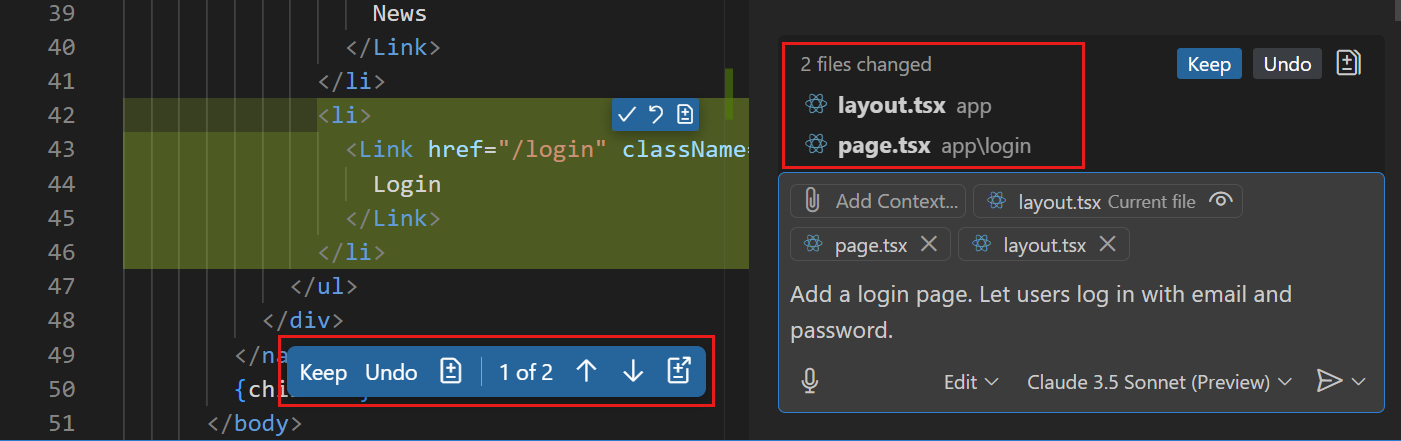
Notice that VS Code streams the suggested edits directly in the editor.
The Chat view shows the list of files that were edited in bold text. The editor overlay controls enable you to navigate between the suggested edits.
-
Review the suggested edits and accept or discard the suggested edits.
-
Continue to iterate on the code changes to refine the edits or to implement additional features.
Accept or discard edits
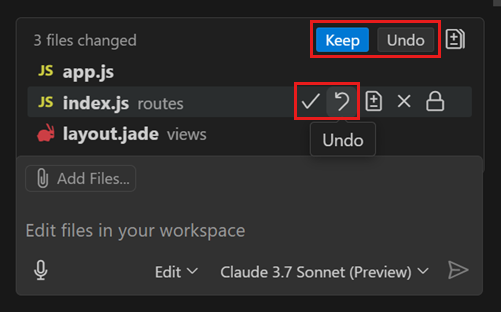
VS Code lists the files that were edited in the changed files list in the Chat view. Files with pending edits also have an indicator in the Explorer view and editor tabs.
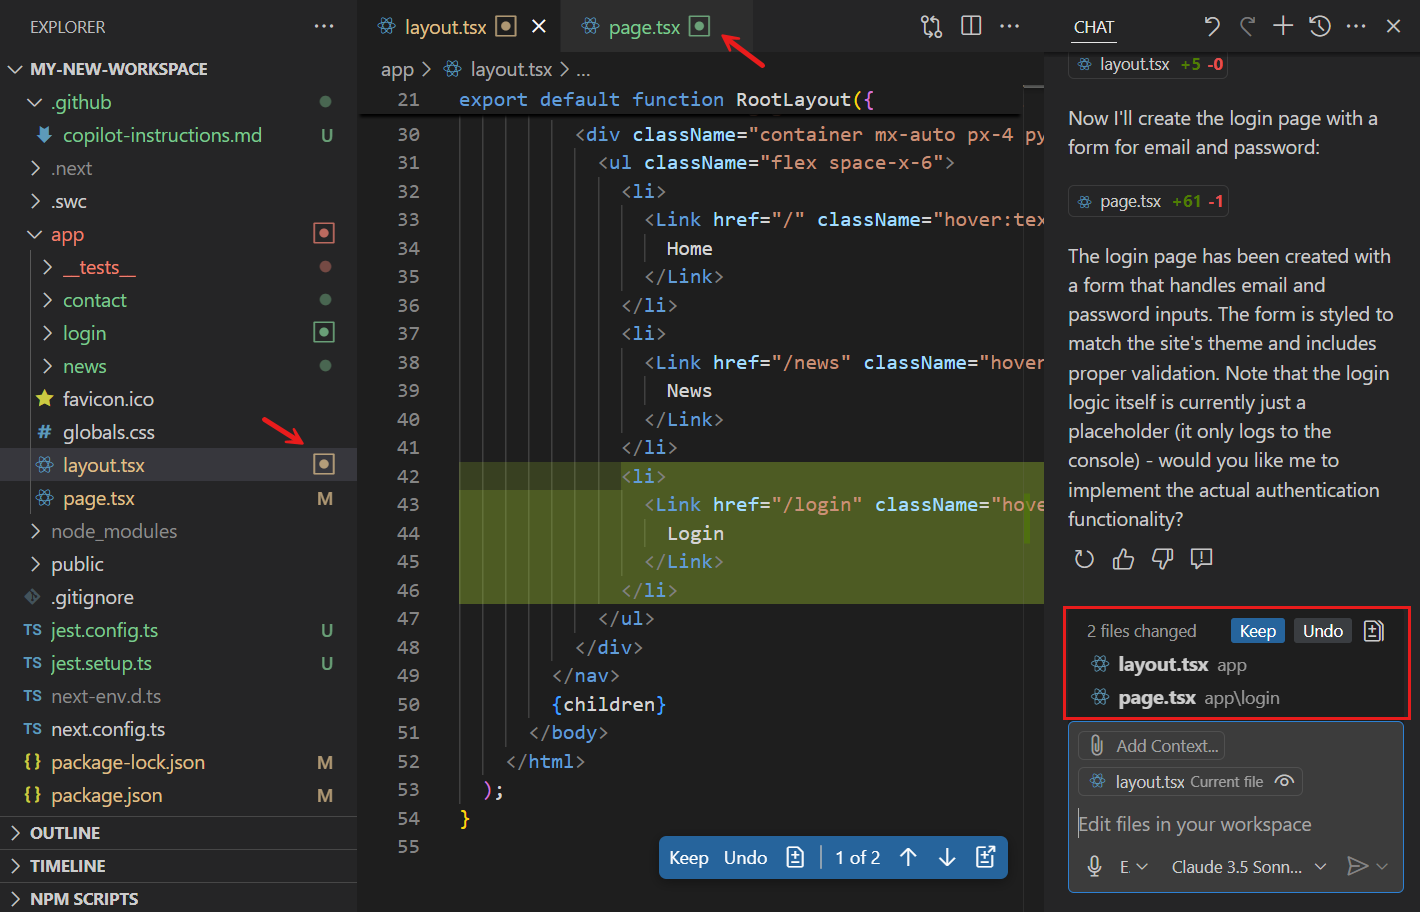
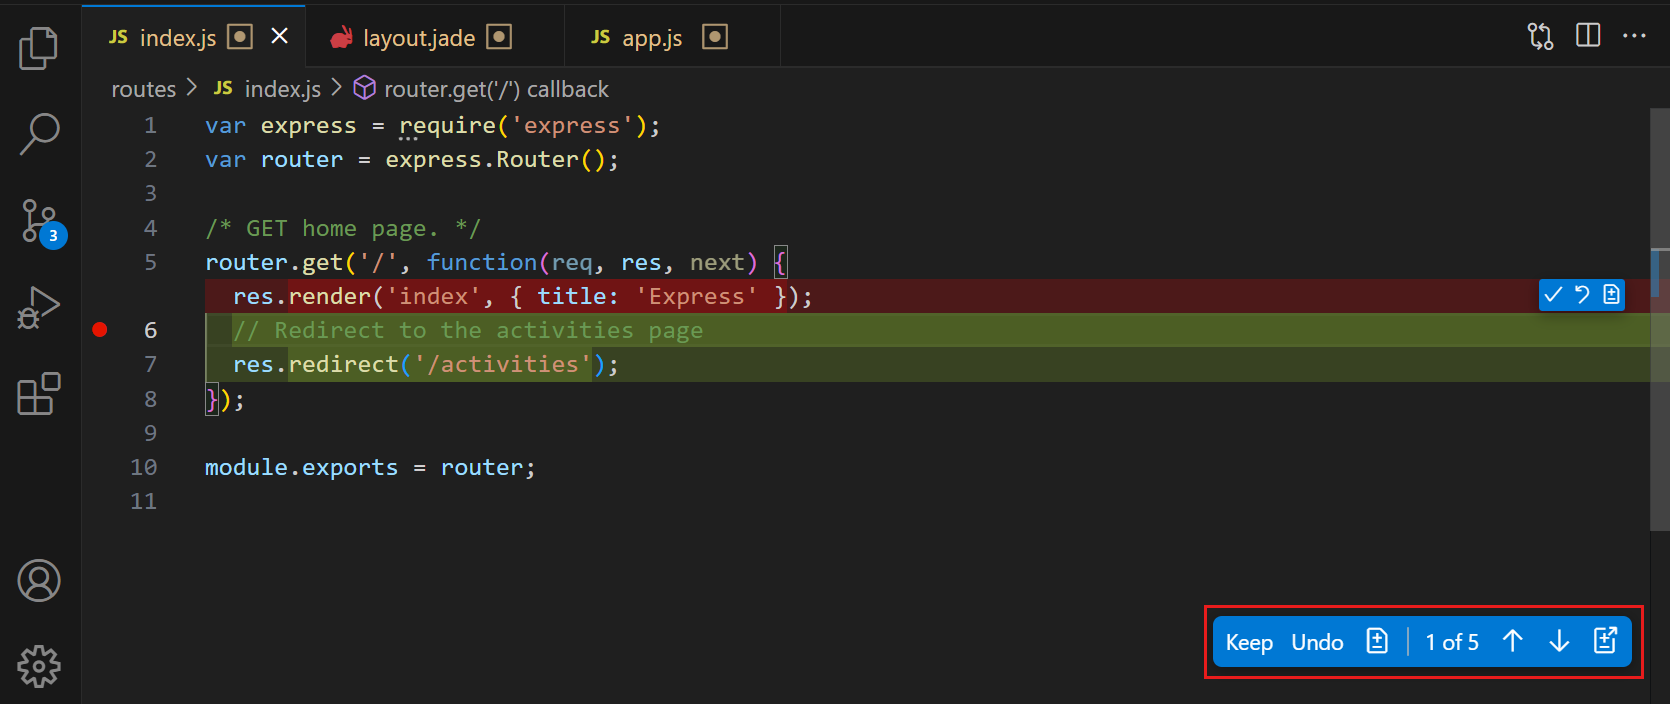
With the editor overlay controls, you can navigate between the suggested edits by using the Up () and Down () controls. Use the Keep or Undo button to accept or reject the edits for a given file.
Use the Keep or Undo controls in the editor or Chat view to accept or reject individual or all suggested edits.
With the chat.editing.autoAcceptDelay setting, you can configure a delay after which the suggested edits are automatically accepted. Hover over the editor overlay controls to cancel the auto-accept countdown.
When you close VS Code, the status of the pending edits is remembered. When you reopen VS Code, the pending edits are restored and you can still accept or discard the edits.
Revert edits
As you're sending requests to make edits to your code, you might want to roll back some of these changes, for example because you want to use another implementation strategy or because the AI starts walking down the wrong path when generating edits.
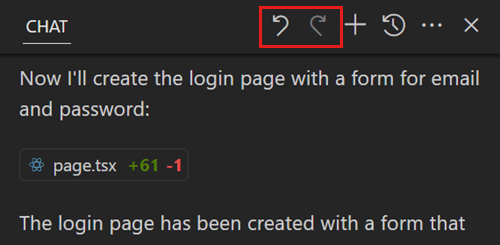
You can use the Undo Last Edit control in the Chat view title bar to revert the last edits and return to the state before sending the last request. After you perform an undo of the last edit, you can redo those edits again by using the Redo Last Edit control in the Chat view title bar.
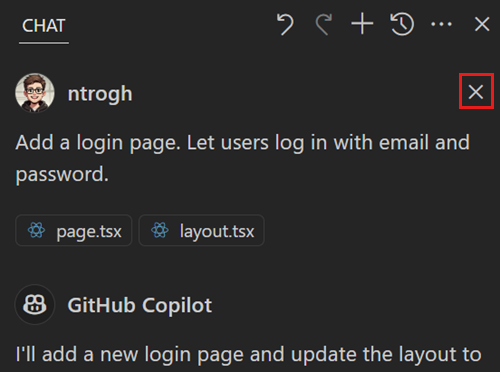
You can also use the Undo Edits (Delete) control (x icon) when hovering over a request in the Chat view to revert all edits that were made from that request onwards.
Use instructions to get AI edits that follow your coding style
To get AI-generated code edits that follow your coding style, preferred frameworks, and other preferences, you can use instruction files. Instruction files enable you to describe your coding style and preferences in Markdown files, which the AI uses to generate code edits that match your requirements.
You can manually attach instruction files as context to your chat prompt, or you can configure the instruction files to be automatically applied.
The following code snippet shows an example of an instruction file that describes your coding style and preferences:
---
applyTo: "**"
---
# Project general coding standards

## Naming Conventions
- Use PascalCase for component names, interfaces, and type aliases
- Use camelCase for variables, functions, and methods
- Prefix private class members with underscore (_)
- Use ALL_CAPS for constants

## Error Handling
- Use try/catch blocks for async operations
- Implement proper error boundaries in React components
- Always log errors with contextual information
Learn more about using instruction files.
Settings
The following list contains the settings related to edit mode. You can configure settings through the Setting editor (⌘, (Windows, Linux Ctrl+,)).
- chat.editing.confirmEditRequestRemoval - ask for confirmation before undoing an edit (default:
true). - chat.editing.confirmEditRequestRetry - ask for confirmation before performing a redo of the last edit (default:
true). - chat.editing.autoAcceptDelay - configure a delay after which suggested edits are automatically accepted, use zero to disable auto-accept (default: 0).
- github.copilot.chat.codesearch.enabled (preview) - let VS Code find the right files when you add
#codebaseto your prompt, similar to how agent mode works (default:false).
Frequently asked questions
Why would I use edit mode instead of agent mode?
Consider the following criteria to choose between edit mode and agent mode:
- Edit scope: you might use edit mode if your request involves only code edits and you know the precise scope for the changes.
- Duration: agent mode involves multiple steps to process a request, so it might take longer to get a response. For example, to determine the relevant context and files to edit, determine the plan of action, and more.
- Non-deterministic: agent mode evaluates the outcome of the generated edits and might iterate multiple times. As a result, agent mode can be more non-deterministic than edit mode.
- Request quota: in agent mode, depending on the complexity of the task, one prompt might result in many requests to the backend.